# Power and CAN Connection
There are several ways to connect power and CAN on different Model 3 / Model Y, depending on the model year. We will introduce all of them to you, which are applicable to most of our mods.
## Method 1 - Power & CAN Connection on Intel MCU
{% hint style="info" %}
This method is only applicable to:
* Model 3 (2017-2021) with Intel Atom MCU
* Model Y (2020-2021) with Intel Atom MCU
You can get **Constant Power** here.
{% endhint %}
First, remove the bottom cover on the passenger side (FRONT RIGHT for LHD cars / FRONT LEFT for RHD cars). It is secured by 3 push pins.
Locate the MCU. Connectors are always on the right side of the MCU.
Disconnect the grey connector from the MCU. It is the second connector counting from bottom. Daisy-chain our Y-splitter wire to the connector pair.
## Method 2 - Power & CAN Connection below Rear Air Vent
{% hint style="info" %}
This method is only applicable to:
* Model 3 (2017-2018) - Connection is 20-pin
* Model 3 (2019-2023) - Connection is 26-pin
* Model Y (2020-2024) - Connection is 26-pin
You can get **Switched Power** here.
{% endhint %}
Remove the plastic cover below the rear air vent.
Disconnect the blue connector.
Daisy chain the provided y-splitter to this connector pair. You
## Method 3 - Power & CAN Connection below Right A-Pillar
{% hint style="info" %}
This method is only applicable to:
* Model 3 (2021-2023)
* Model 3 (2024+)
* Model Y (2020-2024)
* Model Y (2025+) (Power connector is different)
You can get **Switched Power** here.
{% endhint %}
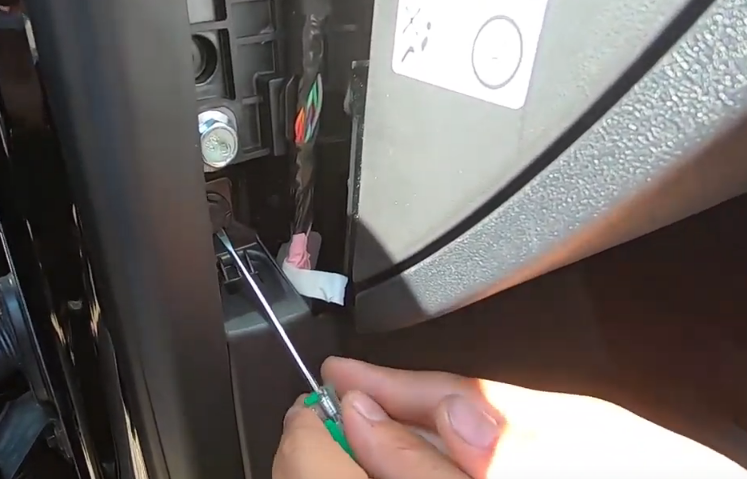
On the right side of the car (the image below shows the left side, but you should work on the right side), release the upper clip that attaches the middle A-Pillar trim to the vehicle. Then, pull the trim upwards to remove it.
Release the topmost clip on the lower A-pillar trim.
Pull the rearmost part of the lower A-pillar trim upward to release the clips and tabs. Then, pull the entire trim rearward to remove it from the vehicle.
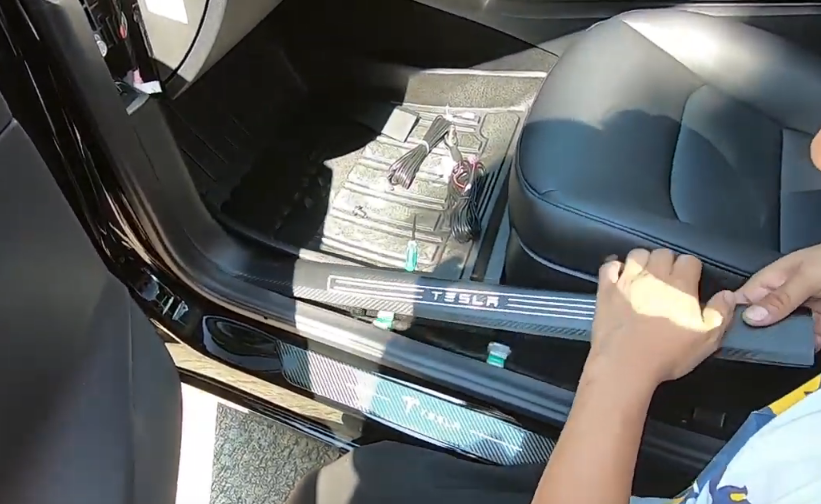
Locate this blue idle connector located behind the kick panel near the door on the right side of the car. The position is slightly different on a Model 3 and a Model Y. You need to pull out the carpet to expose the connector on a Model 3. Now the CAN signal is connected.
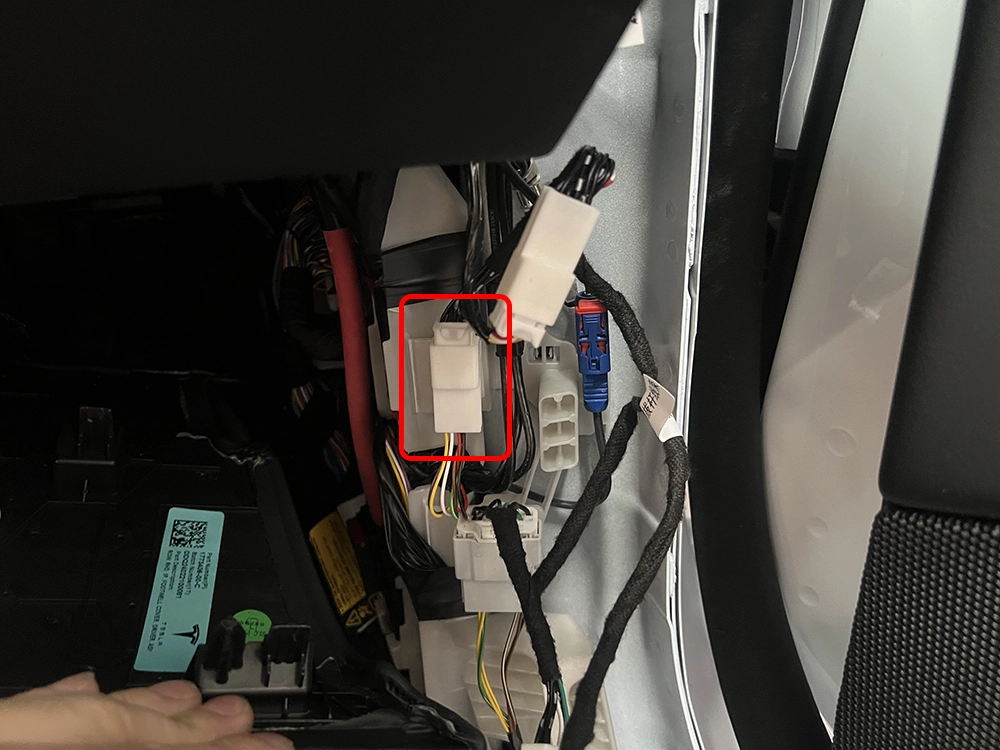
Locate the white connector pair for temperature sensor nearby. Daisy-chain our Y-splitter wire to the connector pair. Now the switched power is connected.
## Method 4 - Power Connection at Low Voltage Battery
{% hint style="info" %}
This method is only applicable to:
* Model 3 (2017-2023)
* Model 3 (2024+)
* Model Y (2020-2024)
You can get **Constant Power** here.
{% endhint %}
*If the wire harness need to be run from the cabin, follow the following instructions. Otherwise, skip directly to the power connection.*
Remove the bottom cover on the front right seat. It is secured by 3 push pins / 1 T-20 screw, depending on the model year. For Model 3 2024+, it is just secured by clips and you can pull it off directly.
Locate the firewall, use a fishing tape to run the power wire throught it.
Retrieve the wire in the frunk area.
Connect the power wire to jump post / positive terminal. For Model Y 2022+, you can sucure the power wire with a M8 nut.
Securing the power wire to jump post on a Model Y with M8 nut
## Method 5 - Power Connection at VC Right
{% hint style="info" %}
This method is only applicable to:
* Model 3 (2017-2020)
You can get **Constant Power** here.
{% endhint %}
Remove the bottom cover on the front right seat. It is secured by 3 push pins / 1 T-20 screw, depending on the model year.
On the right side of the car (the image below shows the left side, but you should work on the right side), release the upper clip that attaches the middle A-Pillar trim to the vehicle. Then, pull the trim upwards to remove it.
Release the topmost clip on the lower A-pillar trim.
Pull the rearmost part of the lower A-pillar trim upward to release the clips and tabs. Then, pull the entire trim rearward to remove it from the vehicle.
After removing the cover, you can access the VCC right in the car. There 's a thick red wire that ends in a 10mm hex nut. Loosen the nut, and then insert the 12V fuse wire into the spot, tighten it. A short wrench is recommended.
---
# Agent Instructions: Querying This Documentation
If you need additional information that is not directly available in this page, you can query the documentation dynamically by asking a question.
Perform an HTTP GET request on the current page URL with the `ask` query parameter:
```
GET https://evoffer.gitbook.io/evoffer-installation-guide/model-3/power-and-can-connection.md?ask=
```
The question should be specific, self-contained, and written in natural language.
The response will contain a direct answer to the question and relevant excerpts and sources from the documentation.
Use this mechanism when the answer is not explicitly present in the current page, you need clarification or additional context, or you want to retrieve related documentation sections.